Sorry I’ve been a little MIA lately… I have good reasoning, I promise!! Firstly, I’ve been socking away at wedding tasks and secondly…
I GOT A JOB! This wont be a habit (not posting for a bit) I just have to get back into the swing of things. I have hit a pretty good stride with the wedding planning though!
Our babies save the dates are off!! I am so happy with how they came out! It was a super sweet experience and I learned some things that I will do differently for the invites.
Since I’m a graphic designer I have high standards for all of my wedding stationary. I have too many options because I can literally do whatever I want. I could do something fun, something whimsical, something flowery, something artsy, something different, etc. The wedding stationary has been the hardest decision of my wedding planning thus far. (I picked the first dress I tried on!) I only finally made my decision on the stationary when my save the date deadline was past nearing the last minute. (Let me live in my delusions that I haven’t been behind on anything for the wedding yet!)
So what did this graphic designer and her lovie decide to do? We went on a classic route. I went with Damask. I didn’t want to have the same exact anything as anyone else, so I actually designed my own damask pattern. I wanted something with a little less graphic approach than a lot of the damask I have seen, so I used thinner flourishes and whatnot.
I only needed 50 envelopes for the Save the Dates. I looked around online for teal envelopes but had no luck finding the color I had in mind in a quantity less than 500, so I decided to make my envelopes. Lesson #1. I will NOT be making my envelopes for my invites. While the ones I made are good, they took a LOT of time to make only 50, and I think it is a little bit of stress I would like to save myself a couple of months before the wedding when I’m making invites. If I make a birthday card or something in the future though, I would totally do it again. For the template for the envelopes I made, check out my envelope tutorial.
So without further ado, here are some pictures! (Cell phone pics, but they’ll have to do for now!)
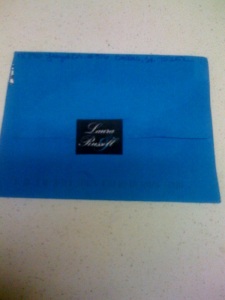
 The outside.
 The back. – It says “Laura & Russell”
 The inside.
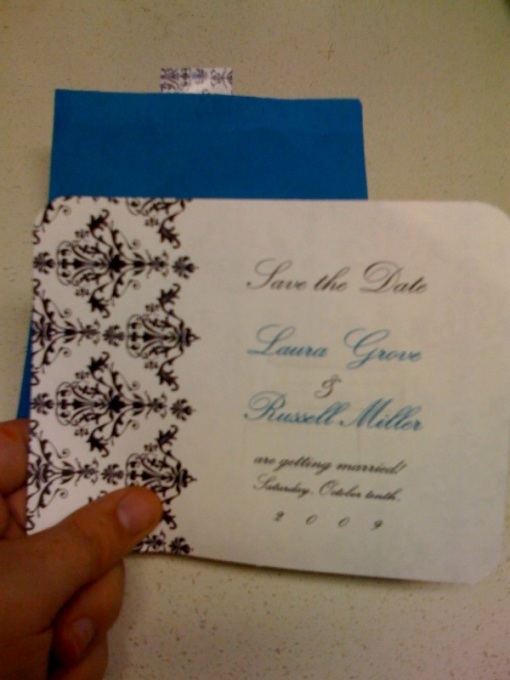
 The save the date.
 The save the date back. I decided to print the pattern on the back for added interest.
 The save the date in the light… the pattern on the back shows through and it is so neat! I love the added effect, and I did this all on my regular old desktop printer!
Supplies: 110 lb. Index Cardstock, printer, paper cutter, corner rounder.
Steps:
1. Print Save the Date front, at this size (4.25×5.5) You can do two to a sheet if you want the pattern to go all the way to the edge like mine, if you don’t have a pattern to the edge, you can do 4 to a sheet. Turn printed sheets over and print on the backs if you want a pattern like mine. Remember to print a few extra in case you mess up on the cutting!
2. Cut the cards out using your paper cutter. Make sure they fit in your envelopes, trim them if you need to so they fit comfortably. Round the corners using your corner rounder.
3. Address your envelopes. Put cards in the envelopes AFTER you address them, You don’t want the ink to seep through the envelopes onto your save the dates, and you don’t want to have to take the save the dates out of any envelopes you mess up addressing. I also made stickers that said “Laura & Russell” to go on the back of the cards. Once I stuffed the envelopes, I sealed them, put the stickers & stamps on and they were wood to go!
 I also made little magnets using one of our engagement pictures. On the top is: Laura & Russell and our wedding website, and on the bottom is a calender of the week of our wedding with our date circled with a heart. It also has the city we’re getting married in on the side.
Supplies: 1/2″ adhesive backed magnet strips cut into 3rds (you don’t need that much magnet on the back of each.) So each magnet once cut was about 1.5″ long.
Steps: Print out your designs on cardstock, cut them out, corner round them, peel off adhesive backing on magnets and stick to the back of your magnet cards.
I really love these. Making them was a special experience because Russell helped a LOT with cutting, magneting, corner rounding, gluing envelopes, placing stickers, etc. He goes, “I can watch TV doing this! This is nothing!” He was very insistent on helping and it meant a lot to me. In fact once I was done printing, cutting, and addressing… he was still working on his part and told me he would finish up and to go take a relaxing shower. I totally couldn’t. I was so in awe of HIM doing the wedding task while I was doing nothing that I didn’t know what to do with myself. I paced the apartment watching him in sheer amusement. lol
I was so nervous putting these in the mail! We worked hard on them and it really was like putting a little piece of us in the mail. I hope everyone gets them okay!

 The outside.
 The back. – It says “Laura & Russell”
 The inside.
 The save the date.
 The save the date back. I decided to print the pattern on the back for added interest.
 The save the date in the light… the pattern on the back shows through and it is so neat! I love the added effect, and I did this all on my regular old desktop printer!
 I also made little magnets using one of our engagement pictures. On the top is: Laura & Russell and our wedding website, and on the bottom is a calender of the week of our wedding with our date circled with a heart. It also has the city we’re getting married in on the side.


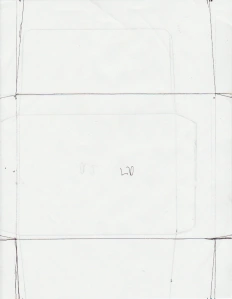
 I then scanned the tracing onto the computer.
 I then made a clean version in illustrator, and wrote some directions for people who use it on the places that would be cut off so they wouldn’t have text on places that they would be using if they decide to print the template directly on paper.
 Then I printed out the template I made, put that sheet of paper back into my printer and printed a light damask pattern on the side with no template so that when I put it together the template would be hidden. I cut out the template, folded it where it says to fold it, added glue to the side areas that needed to be glued, put a card inside of it, and glued down the top flap to seal it so I could address it and mail it.